Export Issues
Search Screen
Use basic or advanced search to filter a list of issues in the Jira Issue Navigator.
Locate the Snowflake Export action at the top right of the Issue Navigator screen:

Note: If you cannot find the Snowflake Export action icon at the top right of the Issue Navigator screen, you may be using a newer Issue Navigator view. Check for the Snowflake item in the Apps dropdown, if present:

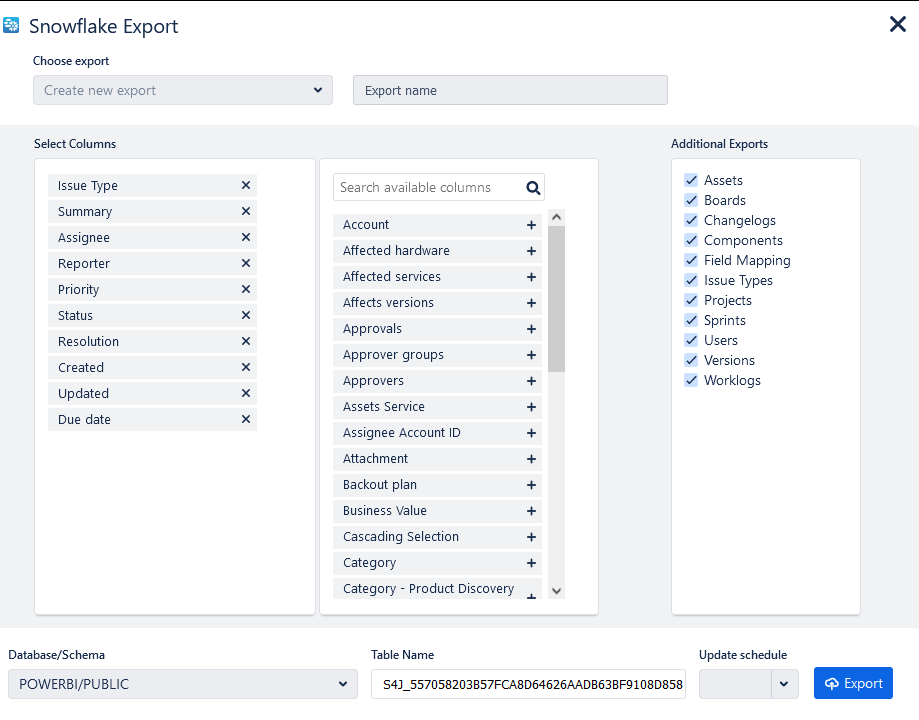
Field Selection
Select the standard and custom fields that you want to export, provide an export name, select an optional update schedule, choose any additional exports you'd like to include, an optional database, schema, and export table name, and click the Export button.
Export Complete
When your export is complete, you will be presented with a screen showing the location of your export and linking you to additional information on the Snowflake Exports screen.
Note: Larger datasets may take several minutes to hours to complete. In this case the screen will present a different message informing you that your export is still in progress. You can go to the Snowflake Exports screen to monitor the progress of your export.

